



















Red Code: Quarantine — Three Weak Points, Three Different Fights
Legs, acid sacs, and carapace each teach a different lesson, and the flashlight and shield share one battery pool on purpose.
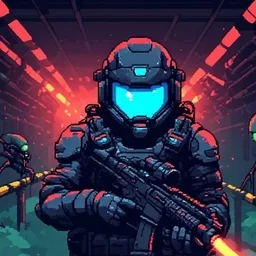
Third and last of today's three-game launch, and the one with the starkest visual identity — a silhouette sci-fi horror shooter through five quarantine sectors of an outbreak-ridden research outpost, ending against a colossal Brood Queen in the hive core. Targeting isn't just point-and-shoot here; every enemy type has an actual weak point you have to identify and hit.
Weak points had to change tactics per enemy, not just be a bigger-damage hitbox
Disabling scuttling swarms by targeting their legs, popping acid sacs on ranged attackers, and cracking through heavy carapace on tougher enemies are three genuinely different targeting problems, not one reused "shoot the glowing spot for bonus damage" mechanic recolored three times. Legs stop an approach outright rather than just chipping health; acid sacs matter because closing to melee is often safer than trading shots with a ranged attacker; carapace requires sustained fire in one spot rather than a quick precision shot. Building three meaningfully different weak-point interactions instead of one reused template meant each enemy category actually teaches a different lesson about how to fight it, rather than the whole cast blurring together into "find the weak point, shoot it" regardless of what's actually attacking you.
Suit battery had to make two useful systems compete for the same resource
The flashlight and the kinetic shield draw from the same battery pool, which means keeping both running simultaneously drains reserves fast, and that shared drain is deliberate tension, not an oversight I'd eventually patch out. Running dark to conserve power for the shield ahead of a fight you can see coming, versus running lit for visibility through an unpredictable dark corridor, is a real ongoing trade-off a player has to keep making rather than a resource that's plentiful enough to never actually think about. If either system had its own independent power source, that tension disappears entirely and both systems just become always-on background utilities with no decision attached to either one.
Keycard color-coding had to stay simple under a horror atmosphere
Unlocking security blast doors with color-coded keycards is a simple, well-worn mechanic, and keeping it simple was actually the right call here rather than a missed opportunity for something more elaborate. A horror atmosphere depends on tension building through pacing and dread, not through a player getting stuck untangling a complicated progression puzzle in the middle of a tense corridor. Color-coded keycards give clear, low-friction progression gating that never competes with the atmosphere for a player's attention, which matters more here than in a game where puzzle-solving itself is the point.
Restoring power nodes had to matter later, not just unlock the next door
Reactor power nodes gate progress the obvious way, opening blast doors and lighting corridors, but I wanted skipping one to have consequences that show up rooms later, not just an immediate locked door in front of you. Several later rooms in each sector depend on power that a rushed player who skipped restoring it earlier will wish they'd already turned on, which teaches a lesson about pacing through a level thoroughly rather than sprinting for the exit. A gate that only blocks the room directly in front of it teaches nothing beyond "go back and flip the switch." A gate whose consequences echo forward into rooms you haven't reached yet teaches actual patience.
The Brood Queen had to demand everything the five sectors taught, at once
A hive-core boss fight that only tests one skill — say, pure damage output — would waste everything the five sectors leading up to it spent teaching about weak points, battery management, and pacing. The Brood Queen fight is built to demand several of those lessons simultaneously: managing suit battery under sustained pressure while still identifying and exploiting weak points on a boss-scale enemy that doesn't behave like anything in the sectors before it. It's the one fight in the whole game where every system introduced earlier actually has to work together at once, which is what makes it feel like a genuine capstone rather than just a much larger version of an earlier enemy.
Bio-Lab upgrades needed to matter without breaking the weak-point system
Upgrading weapons at Bio-Lab armories between sectors could easily have undermined the whole weak-point targeting mechanic if a strong enough weapon upgrade just let a player brute-force through enemies without ever needing to find the actual weak point. I kept upgrades focused on things like reload speed, ammo capacity, and flashlight efficiency rather than raw damage multipliers that would make weak-point precision optional at high enough gear levels. The goal was a player who's fully upgraded still needs to identify legs, acid sacs, and carapace correctly — upgrades make you more capable of executing that targeting under pressure, not a way to skip needing to target at all.
Why the silhouette aesthetic wasn't just an art style choice
Rendering enemies primarily as silhouettes against a toxic-neon backdrop does real functional work beyond setting a mood — it forces weak points to be communicated through shape and glow rather than detailed texture work, which meant every enemy's silhouette had to be legible enough on its own that a player can identify where the weak point is without needing high-detail art to spell it out. That's a genuine design constraint disguised as an aesthetic one, and it's the reason the visual style and the weak-point targeting mechanic feel like they were built for each other rather than a combat system with a horror skin layered on top afterward.
Three complete games in one day is more than I'd usually attempt at once, and this was the one where I felt the time pressure most, since weak-point combat depends on so many individually-tuned interactions across the enemy roster. I'm confident in the core targeting feel. I'm less confident every enemy's weak point is tuned with equal care yet, and that's the honest state of it at launch rather than a claim that everything landed perfectly on the first attempt, across three games built in the same stretch of days.
More from the Devlog